
When a new tenant arrives, you create their profile and then a contract linking them to a room. The contract is what lets the system calculate rent and utilities and generate invoices each month. Both steps take about 10 minutes per tenant.
Before you start
- You have at least one vacant room (see Create buildings, floors and rooms).
- Your role needs the create tenants and create contracts permissions. To sign and activate a contract you also need sign contracts.
- Have the tenant's full name, ID card number and phone number ready, plus the start date, rent and deposit you agreed.
- The tenant must exist in the system before you create a contract, so add the tenant first.
Steps
Open the Create tenant form
In the left menu, under Tenants & contracts, click Tenants, then click Create tenant. The form has blocks for Personal info, Contact, Emergency contact, Internal notes and KYC documents.
Fill in the tenant's details and save
Only Full name (①) is required. Still, fill in Phone number (②) and ID card (③, 9 to 13 digits), because the contract step looks tenants up by ID card number. You can upload the front and back of the ID card in the KYC documents block. Click Create tenant in the top corner to save.
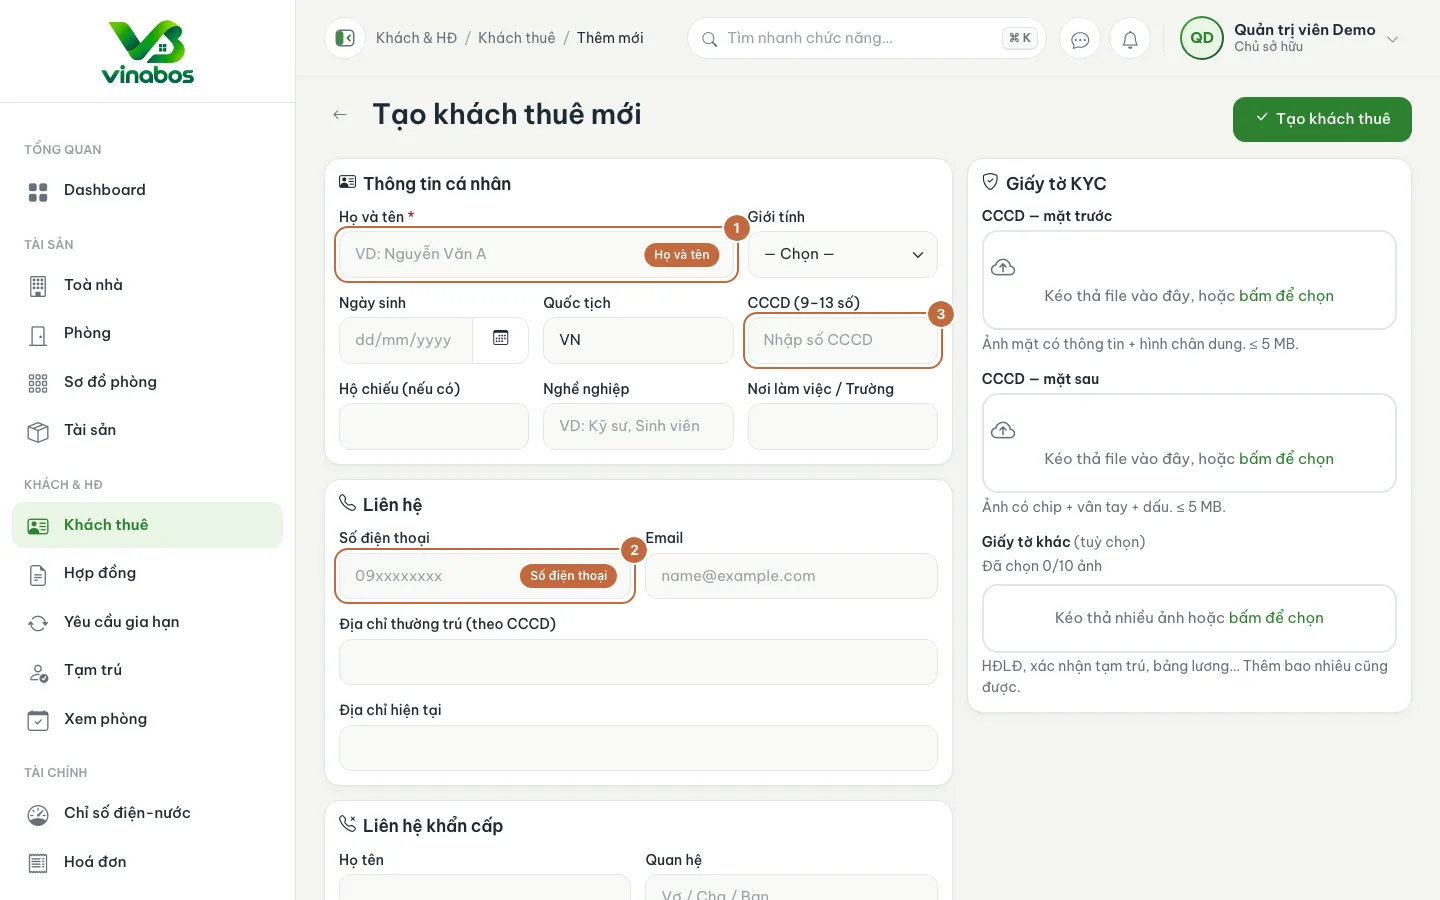
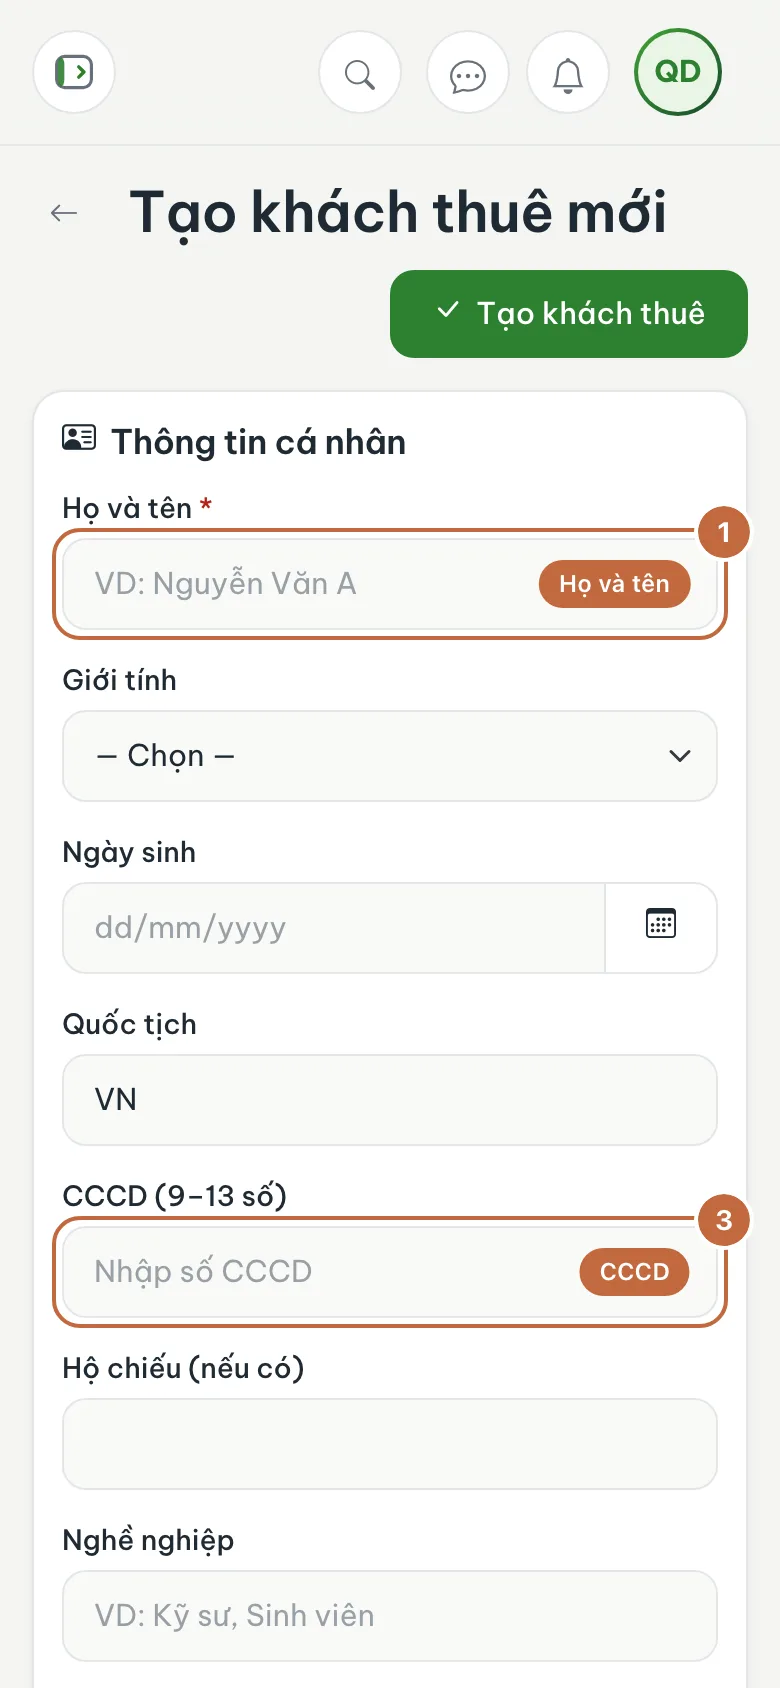
Create tenant form: full name, phone number and ID card Open the Create contract form
Go to Contracts (also under Tenants & contracts) and click Create contract. In block 1. Tenant, type the tenant's ID card number in field ① and click Look up so the system fills in their details. In block 2. Rental room: choose the Building (②), then the Room.
Enter the term, rent and deposit
In block 3. Contract details, choose the Contract type (long term, short term...), Start date, End date, Rent / month and Deposit (③). The deposit field suggests "2 months x rent". In block 4. Services & surcharges, tick the services the tenant uses such as electricity, water, internet and parking. Fill in the other blocks (co-occupants, vehicles, furniture, room handover) if needed.
Save as draft
Scroll to the bottom or look at the right sidebar and click Save draft (④). The contract is saved as a Draft: not in effect yet, and the room is still vacant.
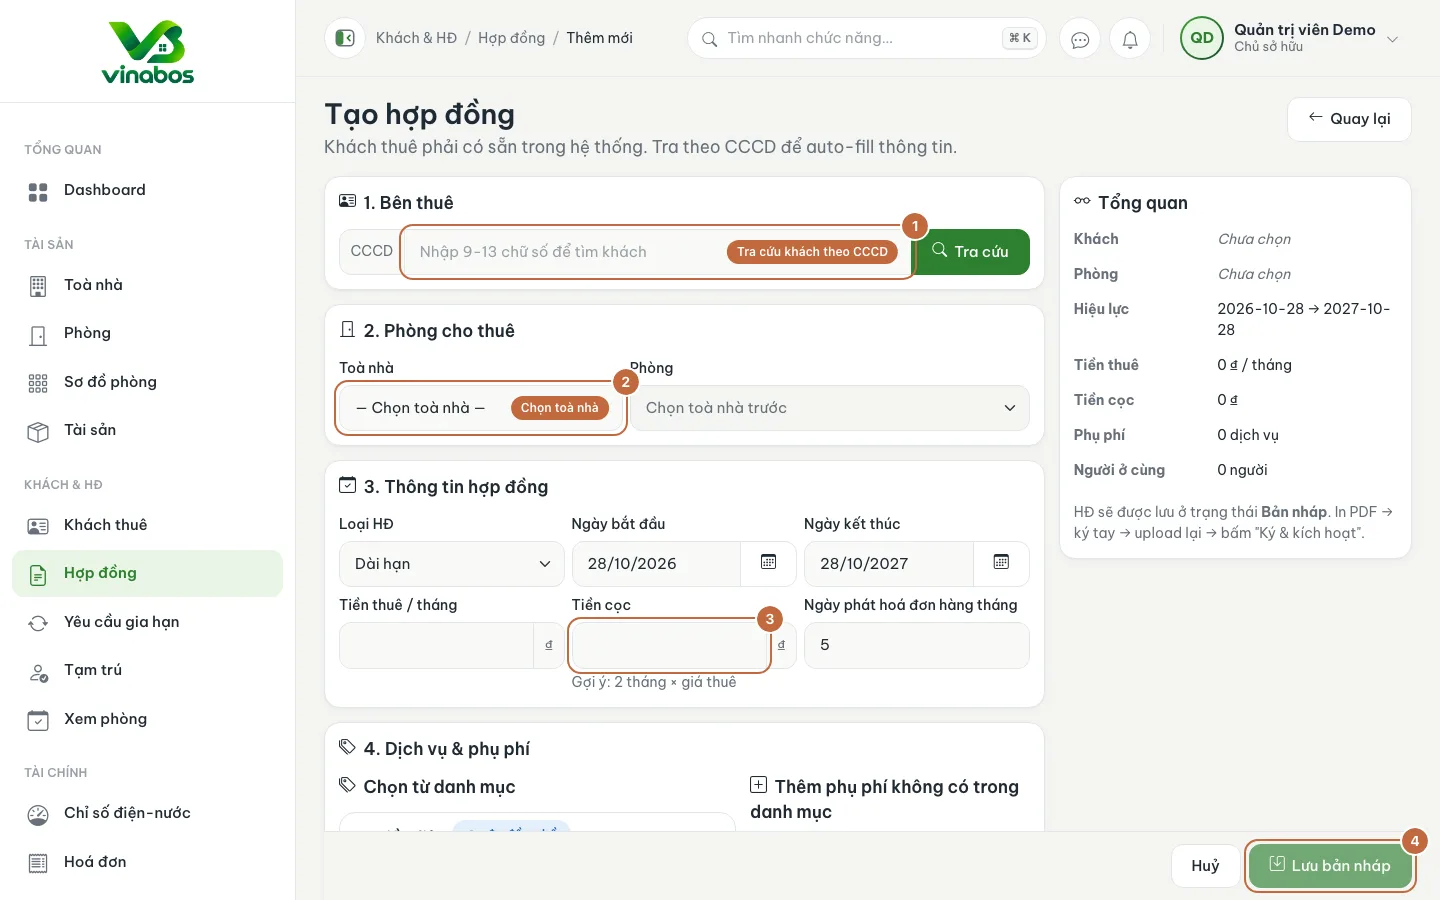
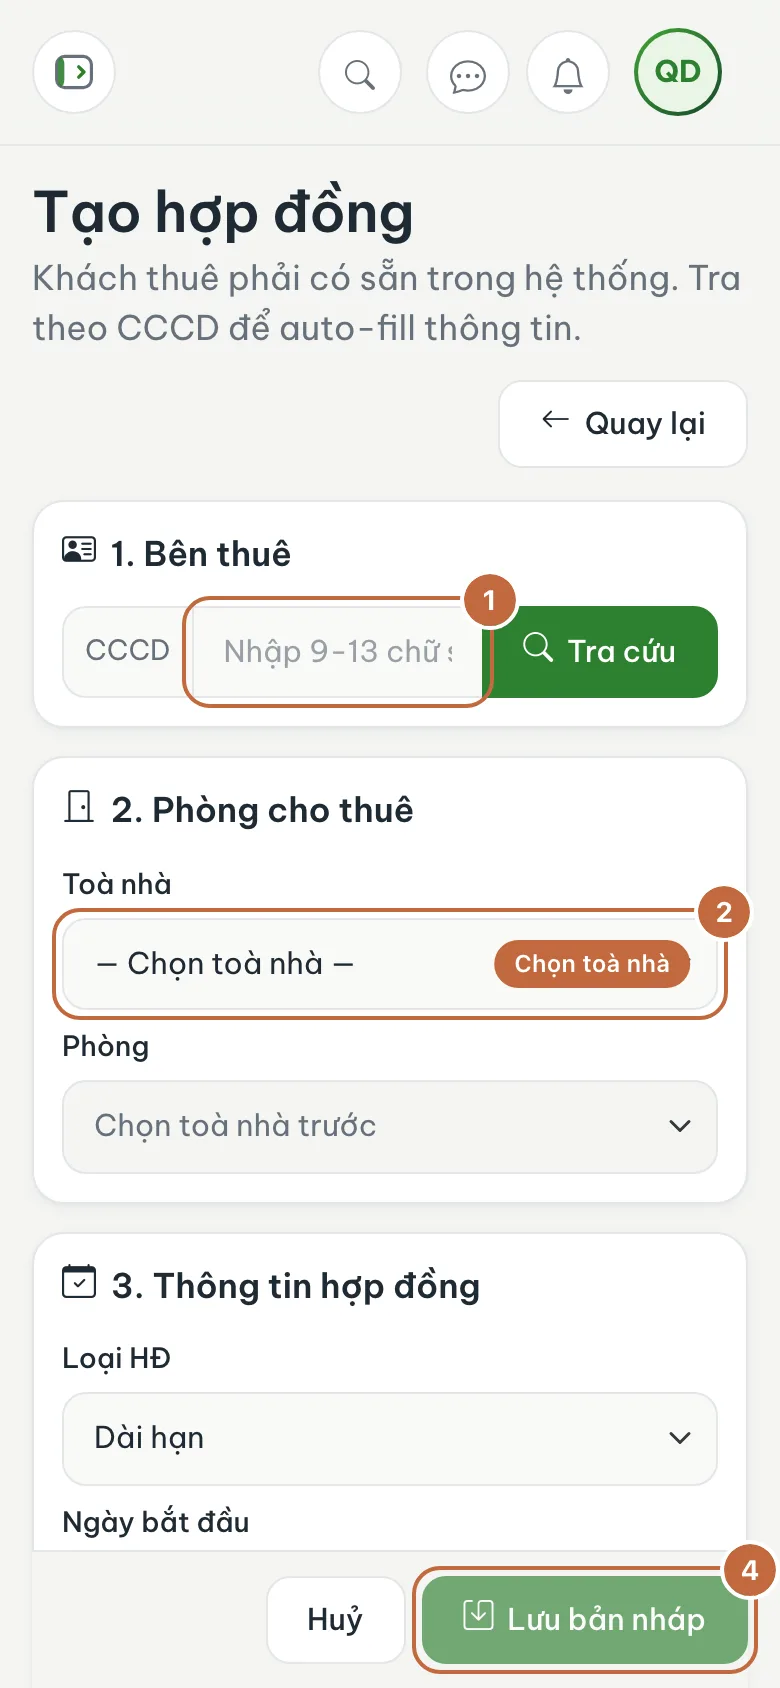
Create contract form: tenant lookup, building, deposit and the Save draft button Print the contract and get it signed
Open the contract you just saved. Click View contract (①) to read it, or Print / PDF and Download Word to hand it to the tenant for signing. The deposit block (②) lets you double-check the agreed amount.
Sign and activate
Once you have the signed copy, reopen the Draft contract and click the green Sign & activate button. Upload the Signed contract file (PDF or image), then click Activate. The room automatically becomes "Occupied". This button only appears while the contract is a draft, so the screenshot below (an active contract) does not show it.
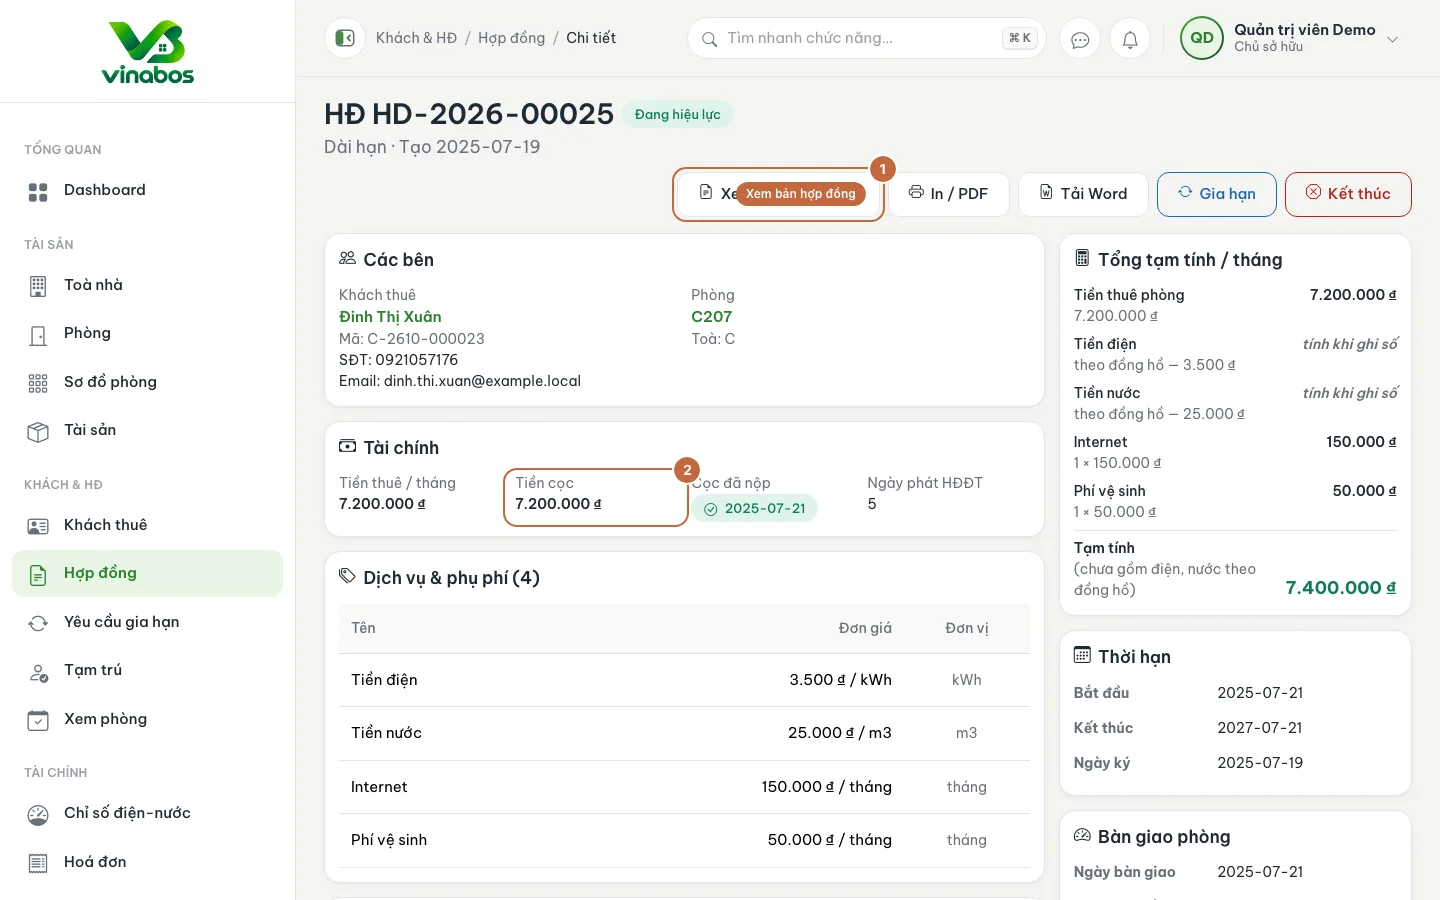
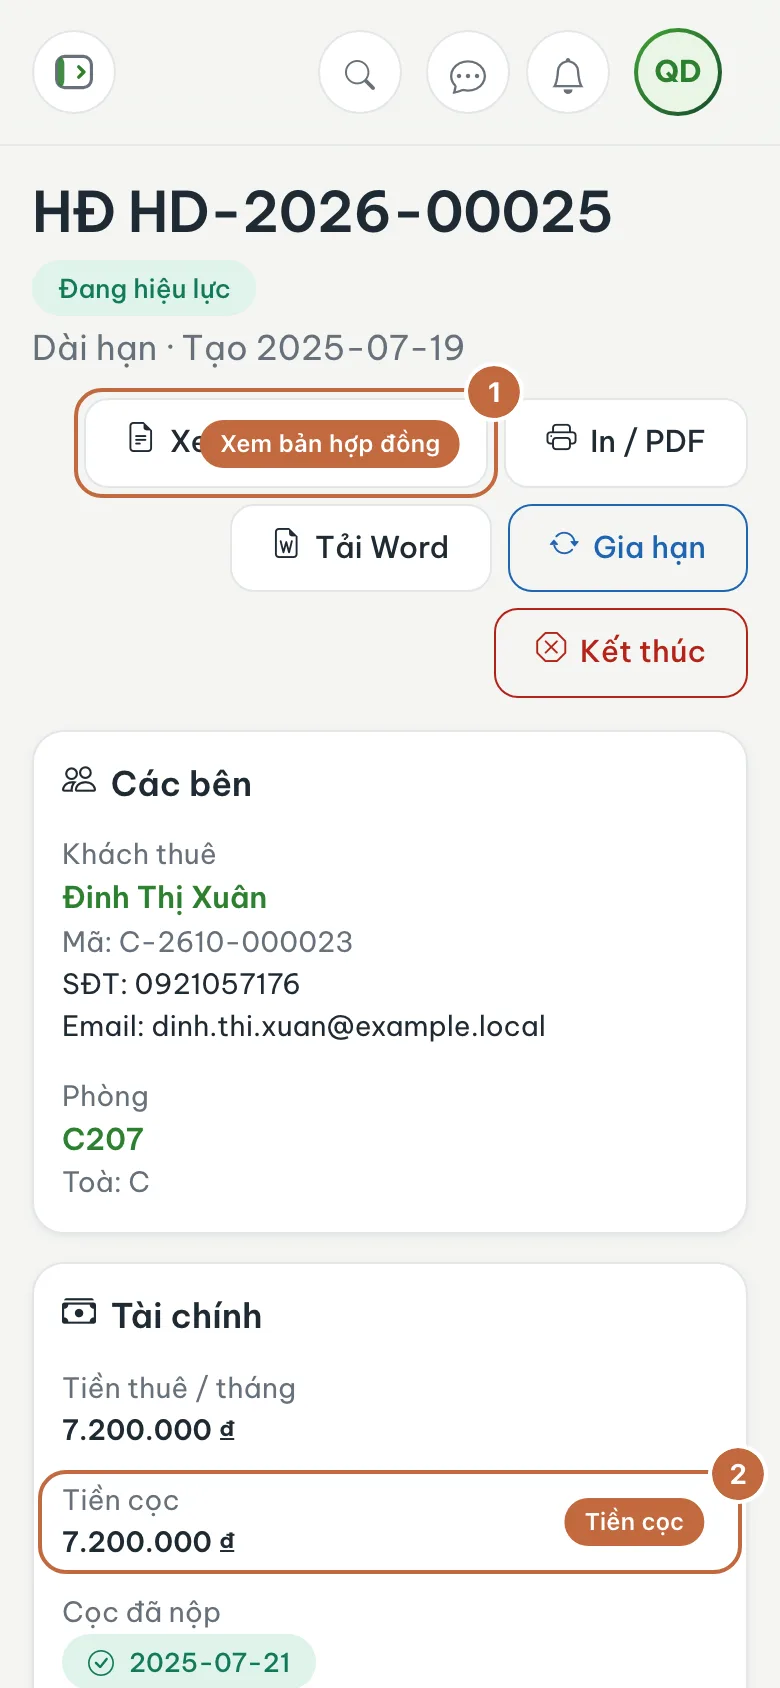
Contract detail page: View contract (①) and the Deposit block (②)
Want to change how the contract looks (logo, clauses, typeface)? Go to Settings › Contract templates and edit it once; every new contract will use that template.
After you sign and activate, the contract content is locked and can no longer be edited like a draft. Check the tenant name, room, rent and deposit carefully before clicking Activate.
On mobile
You can create tenants and contracts right in a phone browser; the form blocks stack vertically. Contracts are long so there is a lot of scrolling; use a computer if you need to enter many surcharges or furniture items. Once a tenant has moved in, uploading ID card photos with your phone camera is very convenient.
FAQ
The ID card lookup does not find my tenant
Make sure the tenant has been created and their profile has the correct ID card number. If a tenant has no ID card yet you can still create the profile, but add it soon for lookups and verification.
Can I edit a draft after saving it?
Yes, as long as the contract is still a Draft. Open the contract and edit it before signing and activating.
Two people will share the room. What now?
The contract is in the name of one representative. List the other person in block 5. Co-occupants.
Next step
The tenant has moved in. When the period comes around, record the meter readings: Record electricity and water readings →
Was this article helpful?
Thanks for your feedback!